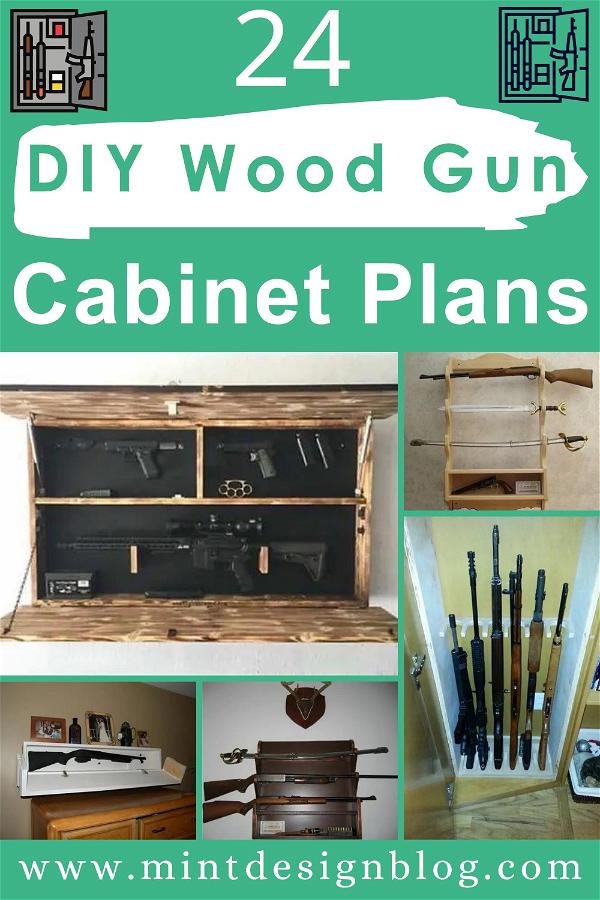
Building a Multi-Section, Multi-Lock Wooden Gun Cabinet
A well-constructed gun cabinet is not only an essential safety measure for responsible gun owners but also a testament to craftsmanship and a stylish addition to your home. This guide will walk you through the process of building a secure, multi-section wooden gun cabinet with multiple locks, ensuring both safety and functionality.
Planning Your Gun Cabinet
The first step is careful planning, which ensures your gun cabinet meets your needs and fits your space.
Determine Size and Configuration
Consider the number and size of firearms you'll store, along with any additional accessories. If you plan to store long guns, ensure the cabinet is tall enough. For handguns, you'll need compartments with adjustable shelves.
Choose Wood and Finish
Select a sturdy, durable hardwood like oak, maple, or cherry. For a more affordable option, consider plywood or MDF with a solid wood veneer. Choose a finish that complements your home decor and provides a protective barrier against moisture and scratches.
Decide on Sections and Locks
Consider separate sections for long guns, handguns, and accessories. Choose secure, quality locks with key or combination mechanisms. Ideally, each section should have its own lock.
Prepare Necessary Materials and Tools
Gather the following materials:
- Wood (lumber or plywood) for the cabinet frame, shelves, and doors
- Lockset(s) with keys or combination mechanisms
- Hinges for doors
- Wood glue
- Wood screws
- Wood filler
- Sandpaper (various grits)
- Paint or stain
- Finishing oil or wax
- Measuring tape
- Level
- Carpenter's pencil
- Handsaw or circular saw
- Drill
- Screwdriver
- Clamps
- Safety glasses and gloves
Construction Process
Once you have your materials and tools, you can begin construction.
Cut and Assemble the Frame
Cut the wood for the cabinet frame (sides, top, bottom, and back) to your specified dimensions. Use a circular saw or handsaw for precise cuts. Cut rabbets or dadoes for shelf support and join the frame pieces together with wood glue and screws. Use clamps to ensure tight joints.
Add Internal Sections and Shelves
If you're creating multiple sections, build internal partitions using similar methods. Cut and assemble the sections to fit within the cabinet frame. Cut shelves for each section, ensuring they are properly supported by the frame or partitions. Attach the shelves to the frame or partitions using screws and glue. For adjustable shelves, consider using shelf pins or brackets.
Install Doors
Cut and assemble the doors to your desired size and style. Ensure they are properly fitted to their corresponding openings. Install hinges on the doors and attach them to the cabinet frame. Once the doors are securely hinged, install the locks. For added security, consider installing a deadbolt lock for the main cabinet door.
Finish the Cabinet
Once the cabinet is assembled, prepare the surface for finishing by sanding it smooth with various grits of sandpaper. Fill any gaps or imperfections with wood filler and sand again. After sanding, apply your chosen finish, whether it's paint, stain, or a combination of both. Apply multiple coats for a durable and long-lasting finish. Let the finish dry completely before handling.
Safety Considerations
Remember, safety should be your top priority when working with wood and power tools. Follow these guidelines:
- Wear safety glasses and gloves to protect your eyes and hands.
- Use proper ventilation when working with paint or stain.
- Always unplug power tools when not in use and before making adjustments.
- Keep tools sharp and in good working order.
- Be aware of your surroundings and avoid distractions while working.
Final Touches and Maintenance
After the finish has dried, your gun cabinet is ready for use. To maintain its beauty and functionality, consider the following:
- Apply a coat of polish or wax periodically to maintain the finish and protect against scratches.
- Store firearms in their appropriate sections and keep the cabinet organized.
- Inspect the locks and hinges regularly to ensure they function properly. Lubricate them as needed.
- Keep the cabinet clean and free of dust and debris.
- If you notice any signs of damage or wear, address them promptly.
Conclusion
By carefully planning and following these instructions, you can build a secure, stylish, and functional gun cabinet. This project combines practicality and craftsmanship, allowing you to create a safe and organized storage solution for your firearms. Remember, always prioritize safety throughout the construction process, and enjoy the satisfaction of building your own gun cabinet.