How to Build Beautiful Woodworking Projects as a Beginner

How to Build Beautiful Woodworking Projects as a Beginner

Embarking on the Journey of Woodworking: A Beginner's Guide to Creating Beautiful Projects

Woodworking, the art of crafting with wood, has captivated enthusiasts for centuries. Its allure lies in the transformation of raw materials into functional and aesthetically pleasing objects. For beginners, the prospect of creating beautiful woodworking projects can be daunting, but it is a journey filled with immense satisfaction and creative fulfillment. This guide provides a comprehensive framework for embarking on this journey, offering practical advice and essential steps to help you build stunning projects, regardless of your experience.

Essential Tools and Materials

Before diving into woodworking projects, it's crucial to have the right tools and materials at your disposal. Investing in quality tools ensures precision, longevity, and a smooth woodworking experience. Here are some essential tools for beginners:

Hand Tools

  • Measuring Tape: Essential for accurate measurements and ensuring precise cuts.
  • Combination Square: Used for checking right angles, marking lines, and transferring measurements.
  • Pencil: For marking wood and creating precise lines.
  • Hammer: Used for driving nails and assembling projects.
  • Screwdriver: Essential for securing screws and various woodworking tasks.
  • Chisels: Used for shaping, carving, and removing excess wood.
  • Hand Plane: For smoothing wood surfaces and achieving desired contours.
  • Sandpaper: Essential for smoothing wood and removing imperfections.

Power Tools

While not strictly necessary for beginners, power tools can significantly enhance efficiency and accuracy:

  • Circular Saw: Used for making straight cuts through wood.
  • Jigsaw: For cutting intricate shapes and curves in wood.
  • Drill/Driver: Used for drilling holes and driving screws.
  • Belt Sander: For smoothing and shaping larger wood surfaces.
  • Random Orbit Sander: Offers a more controlled finish compared to belt sanders.

Essential Materials

  • Wood: Choose wood based on your project and desired aesthetic. Common choices include pine, oak, maple, and cherry.
  • Screws and Nails: Essential for joining wood pieces and securing them together.
  • Wood Glue: Provides strong and permanent bonds between wood pieces.
  • Finish: Protects and enhances the appearance of your finished woodworking project. Options include paints, stains, varnishes, and oils.

Getting Started: Choosing Your First Project

Selecting the right first project is crucial for a beginner. It should be manageable in terms of complexity and size, while allowing you to gain confidence and practice fundamental skills. Here are some suggestions for beginner woodworking projects:

  • Simple Cutting Boards: These projects introduce you to basic cutting techniques, sanding, and finishing.
  • Wooden Boxes: Great for mastering joinery techniques and applying various finishes.
  • Birdhouse: This project allows you to work with different wood shapes and experiment with design.
  • Wooden Shelf: A functional and practical project that demonstrates basic woodworking skills.

When choosing your first project, consider your available time, skill level, and desired outcomes. Starting small and gradually increasing complexity as you gain experience is key.

Building a Solid Foundation: Mastering Basic Skills

Woodworking involves a range of skills, which are best acquired through practice and patience. Mastering these foundational skills will pave the way for creating more complex and stunning projects:

1. Measuring and Cutting

Accuracy is paramount in woodworking. Learn to use a measuring tape proficiently, ensuring precise measurements for cuts. Utilize a combination square for checking right angles and marking lines. Familiarize yourself with different cutting tools, such as a circular saw and jigsaw, and practice making clean and accurate cuts.

2. Joining Techniques

Joining wood pieces together is essential for building sturdy and functional projects. Learn various joinery techniques, including:

  • Butt Joints: The simplest joint, where two pieces of wood are joined end-to-end.
  • Lap Joints: One piece of wood overlaps another, creating a stronger bond.
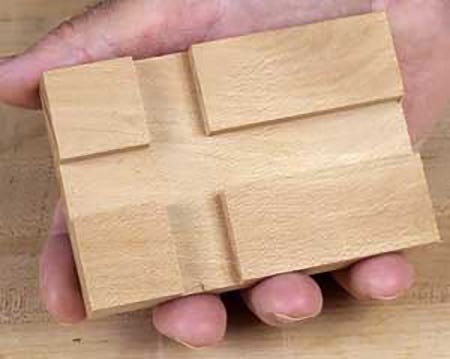
  • Dado Joints: A groove is cut into one piece of wood, and a matching tongue is cut into the other piece, creating a secure connection.
  • Mortise and Tenon Joints: A rectangular hole is cut in one piece of wood, and a matching projection is cut into the other piece, creating a strong and durable joint.

3. Sanding and Finishing

Sanding smooths wood surfaces and prepares them for finishing. Use sandpaper with different grits, starting with coarser grits for removing imperfections and ending with finer grits for a smooth finish. Experiment with various finishes, such as paints, stains, varnishes, and oils, to achieve the desired look and protection for your woodworking projects.

Embrace the Learning Process

Woodworking is a journey of continuous learning. Don't be afraid to make mistakes; they are valuable learning experiences. Seek out resources such as online tutorials, books, woodworking classes, and expert advice to enhance your knowledge and skills.

  • Online Tutorials: Numerous websites and platforms offer free woodworking tutorials, covering a wide range of projects and techniques.
  • Books and Magazines: Woodworking books and magazines provide detailed instructions, project plans, and insights into techniques and materials.
  • Woodworking Classes: Local community colleges, woodworking clubs, and specialized schools offer hands-on woodworking classes taught by experienced instructors.
  • Woodworking Forums and Communities: Online forums and communities provide a platform to connect with other woodworkers, share ideas, ask questions, and receive feedback.

Safety First: Protecting Yourself in the Workshop

Woodworking requires a commitment to safety. Always prioritize safety in your workshop to prevent injuries and accidents.

  • Wear Eye Protection: Eyeglasses or safety goggles protect your eyes from flying debris and wood chips.
  • Use Hearing Protection: Earplugs or earmuffs reduce noise levels, protecting your hearing from damage.
  • Wear a Dust Mask: Protect your lungs from inhaling dust and wood particles.
  • Proper Clothing: Avoid loose clothing that can get caught in machinery, and wear sturdy shoes to protect your feet.
  • Keep Your Workshop Clean and Organized: A tidy workspace reduces the risk of tripping hazards and accidents.
  • Always Disconnect Power Tools Before Making Adjustments: This prevents accidental starts and ensures your safety.

Beyond the Basics: Exploring Advanced Woodworking

As you gain experience and confidence, you can explore more advanced woodworking techniques and projects.

  • Turning: Using a lathe to create round objects, such as bowls, vases, and spindles.
  • Carving: Using hand tools to sculpt wood into three-dimensional forms.
  • Inlay: Embedding materials like wood, metal, or stone into a wooden surface to create intricate patterns and designs.
  • Veneering: Applying thin sheets of wood veneer to a base material to create a beautiful and durable surface.

Woodworking is a rewarding and fulfilling hobby that allows you to express your creativity and create beautiful, functional objects. By following these tips and embracing the learning process, you can embark on your woodworking journey and bring your imaginative projects to life.

Read More..

Profitable DIY Picture Frame Ideas for Beginners

Profitable DIY Picture Frame Ideas for Beginners

Profitable DIY Picture Frame Ideas for Beginners

Are you looking for a creative and profitable side hustle? Look no further than crafting custom picture frames! This DIY project is perfect for beginners, requires minimal investment, and offers a wide range of customization options. Get ready to unleash your creativity and start earning from the comfort of your own home.

Start With the Basics

Before diving into fancy designs, master the fundamentals of picture frame construction. You'll need basic tools like a saw, a miter box, a hammer, and a staple gun. You can choose from various materials, including wood, cardboard, metal, or even repurposed items.

Wood Frames: A Classic Choice

Wood is a timeless material for picture frames. Visit a local lumberyard or hardware store to find affordable wood strips in various sizes and finishes. Cut the wood to your desired dimensions using a miter saw for precise 45-degree angles. Secure the pieces together using wood glue and finish nails.

Cardboard Frames: Eco-Friendly and Budget-Friendly

For a budget-friendly option, cardboard is a great choice. You can find thick cardboard sheets at art supply stores or even repurpose boxes from your home. Use a ruler and a sharp utility knife to create precise cuts and join the pieces with glue.

Add a Touch of Personality

Once you have a basic frame, it's time to personalize it! This is where your creativity shines. Experiment with different techniques to create eye-catching frames.

Paint and Stain

Transform your frames with paint in vibrant colors, distressed finishes, or even metallic accents. You can also use wood stains to enhance the natural beauty of your wooden frames. Let your imagination run wild!

Decoupage

Decoupage involves adhering paper, fabric, or other materials to the frame's surface. Use decoupage glue or Mod Podge to create a smooth and durable finish. Experiment with patterned papers, magazine clippings, or even fabric scraps to add texture and visual interest.

Embellishments

Enhance your frames with decorative elements like beads, buttons, ribbon, or even dried flowers. Use hot glue to secure these embellishments to the frame for a personalized touch.

Showcase Your Skills

Once you've created a collection of beautiful and unique frames, it's time to showcase your skills and start earning. Here are some ways to sell your DIY frames:

Online Marketplaces

List your frames on online marketplaces like Etsy, eBay, and Facebook Marketplace. These platforms offer a wide audience and allow you to set your own prices.

Local Craft Fairs and Markets

Participate in local craft fairs and markets to connect directly with potential customers. You can showcase your frames, interact with buyers, and receive immediate feedback.

Direct Sales

Reach out to friends, family, and local businesses to promote your DIY frames. Consider offering discounts for bulk orders or personalized framing services.

Tips for Success

To maximize your chances of success, consider these tips:

  • High-Quality Materials: Use quality materials to ensure your frames are durable and visually appealing.
  • Clear Product Photography: Capture high-quality photos of your frames to showcase their details and attract potential buyers.
  • Competitive Pricing: Research the market to determine fair pricing for your frames.
  • Excellent Customer Service: Respond promptly to inquiries and provide exceptional customer service to build a loyal following.

Starting a DIY picture frame business requires passion, creativity, and a willingness to learn. By following these steps, you can transform your love for crafting into a profitable venture.

Read More..

How to Craft Beautiful Floating Shelves for Every Room

How to Craft Beautiful Floating Shelves for Every Room

How to Craft Beautiful Floating Shelves for Every Room

Floating shelves are a versatile and stylish addition to any room, offering a functional solution for storage and display while enhancing the overall aesthetic. Whether you're seeking to create a minimalist, modern, or eclectic look, these DIY instructions will guide you through crafting beautiful floating shelves for every room in your home.

Materials and Tools

Before embarking on your shelf-making journey, gather the necessary materials and tools to ensure a smooth and successful project:

Materials

  • Wood Boards: Select wood boards of your desired thickness and width, considering the weight of the items you'll be storing. Popular choices include plywood, MDF, or solid wood like oak or pine.
  • Brackets: Choose brackets that are strong enough to support the weight of your shelves and are compatible with your chosen wood type. Metal brackets offer a modern look, while wooden brackets provide a more rustic feel.
  • Wood Stain or Paint: Opt for a stain or paint that complements the overall style of your room and the chosen wood type. Consider using a sealant to protect the finish.
  • Screws: Select screws that are long enough to secure the brackets to the wall and the shelf to the brackets.
  • Wall Anchors: If you are attaching shelves to drywall, wall anchors are necessary to provide additional support and prevent the shelves from pulling away from the wall.
  • Measuring Tape, Level, Pencil, Drill, and Screwdriver: Essential tools for accurate measurements, precise leveling, and secure installation.

Tools

  • Measuring Tape: For accurate measurements of shelf dimensions and wall spacing.
  • Level: To ensure the shelves are installed straight and horizontally aligned.
  • Pencil: For marking the wall for bracket placement.
  • Drill: For drilling pilot holes for screws and attaching brackets to the wall.
  • Screwdriver: For securing screws into the brackets and attaching shelves to the brackets.
  • Sandpaper: For smoothing out any rough edges on the wood boards and creating a more polished finish.
  • Safety Glasses and Dust Mask: To protect your eyes and respiratory system during sanding and drilling.

Step-by-Step Guide

Once you have gathered all the necessary materials and tools, follow these step-by-step instructions to craft stunning floating shelves:

1. Determine the Shelf Dimensions and Location

Begin by measuring the space where you want to install your shelves. Consider the desired height of the shelves and the weight of the items you'll be storing. Allow sufficient clearance above and below each shelf. Mark the wall with a pencil to indicate the desired shelf placement.

2. Prepare the Wood Boards

Cut the wood boards to the desired length, ensuring they are perfectly straight and smooth. If necessary, use sandpaper to smooth out any rough edges and create a polished finish. Apply wood stain or paint to the boards, following the manufacturer's instructions, and allow them to dry completely.

3. Install the Brackets

Use a level to determine the exact position for the brackets on the wall. Mark the wall with a pencil, and drill pilot holes to prevent splitting the wood when screwing in the brackets. Secure the brackets to the wall using the appropriate screws, ensuring they are firmly attached and can support the weight of the shelves.

4. Attach the Shelves to the Brackets

Position the shelves onto the brackets and secure them using screws, making sure the shelves are perfectly level and aligned. Be sure to tighten the screws securely, but avoid overtightening, which could damage the wood.

5. Add Finishing Touches

Once the shelves are installed, apply any additional finishing touches, such as adding a sealant to protect the finish or installing decorative hardware. You can personalize your shelves with custom labels or decorative accents to complement your room's style.

Creative Ideas for Floating Shelves

Floating shelves provide endless possibilities for showcasing your personal style and enhancing the beauty of your home. Here are some inspiring ideas to transform your shelves into stunning focal points:

1. Minimalist Elegance

For a minimalist aesthetic, choose simple, clean-lined shelves made from wood with a natural finish. Keep the décor minimal, focusing on a few carefully curated items, such as plants, books, or decorative objects with clean lines and a muted color palette.

2. Eclectic Charm

Embrace an eclectic style by incorporating a variety of materials and textures. Mix and match different wood types, metals, and fabrics. Arrange unique and personal items, such as vintage collectibles, travel souvenirs, or handmade crafts. Let your personality shine through.

3. Rustic Appeal

For a rustic feel, opt for shelves made from reclaimed wood or wood with a distressed finish. Add rustic décor elements like baskets, candles, and woven rugs. Consider using metal brackets with a weathered look.

4. Modern Sophistication

Create a sleek and modern look with shelves made from polished wood or sleek metal. Incorporate minimalist décor elements like geometric shapes, metallic accents, and modern art prints. Keep the color palette neutral and clean.

5. Functional and Stylish

Combine practicality and style by using floating shelves for storage and display. In your kitchen, use them to organize spices, cookbooks, and decorative items. In your bathroom, use them to store toiletries, towels, and candles. In your office, use them to display books, stationery, and inspiring quotes.

Conclusion

Crafting beautiful floating shelves is a rewarding DIY project that allows you to express your personal style and enhance the functionality of your home. By following these step-by-step instructions and incorporating creative ideas, you can transform your spaces into aesthetically pleasing and personalized havens.

Read More..

How to Cut Dado Joints with a Router Table

How to Cut Dado Joints with a Router Table

Cutting Dado Joints with a Router Table

Dado joints, also known as "housing joints," are strong and visually appealing woodworking joints that create a channel or groove to receive a piece of wood. Router tables are a convenient and precise way to cut these joints, offering a safe and controlled environment for your project. This article will guide you through the process of cutting dado joints with your router table.

Setting Up Your Router Table

Before you begin, ensure your router table is securely set up and your work area is clean. Here's how to prepare for cutting dados:

Choosing the Right Router Bit

For cutting dado joints, you'll need a dado set, which consists of multiple cutters that create a wider groove. These sets come in various sizes, so choose one that matches your project's requirements. Ensure the cutters are sharp and free from damage for a smooth and accurate cut.

Adjusting the Fence and Router Bit Height

Set the fence on your router table to the width of your desired dado. This dictates the groove's width. Adjust the router bit's height so that it protrudes just enough to create the desired dado depth. Remember to factor in the thickness of your wood when determining the bit's height.

Setting up a Guide

A guide is essential for accurate dado cutting. You can use a simple push block, a shop-made jig, or a dedicated dado jig for precise alignment. The guide should align with the fence, ensuring the dado cuts are parallel to the edge of your workpiece.

Cutting the Dado Joint

Now that your router table is set up, you can begin cutting the dado joints:

Cutting the First Pass

Position your workpiece against the fence and guide, ensuring it's securely held down. Make the first pass, cutting a portion of the dado. Keep the router running at a constant speed, ensuring smooth movement across the workpiece.

Cutting Subsequent Passes

To achieve the desired dado depth, you'll likely need to make multiple passes. After each pass, adjust the fence slightly to move the cutting path inward. This helps ensure the dado is consistent throughout its length.

Cleaning Up the Dado

After completing all passes, you might need to clean up the dado with a chisel or a hand plane. This ensures a smooth and uniform groove for a perfect fit with your other workpiece.

Tips for Success

Here are some additional tips to enhance your dado cutting with a router table:

  • Use a sacrificial board: Protect your router table's surface by placing a sacrificial board beneath your workpiece. This prevents damage to the table surface and allows for easier clean-up.
  • Cut multiple dados at once: For repeated dado cuts, create a jig to hold multiple workpieces in alignment. This improves efficiency and ensures consistency across multiple cuts.
  • Practice first: Before starting your project, practice cutting dados on scrap wood to refine your technique and ensure a smooth workflow.

Safety Considerations

Safety is paramount when working with power tools. Here are some precautions to take when cutting dados on a router table:

  • Always wear eye protection: Protect your eyes from flying debris and wood chips. Consider using a face shield for added safety.
  • Keep your fingers clear: Never place your fingers near the router bit while it's in operation. Use push sticks or a guide to guide the workpiece safely.
  • Disconnect the router: Always unplug the router when making adjustments or cleaning the table. Never attempt to clean or adjust the router while it's powered on.

By following these tips and precautions, you can safely and efficiently cut dado joints on your router table, producing stunning results for your woodworking projects.

Read More..

Functional Toolbox Organizer Ideas for Every Budget

Functional Toolbox Organizer Ideas for Every Budget

Functional Toolbox Organizer Ideas for Every Budget

Let’s face it: a messy toolbox is a recipe for frustration. You waste precious time searching for that elusive wrench, and the chaos can make even the simplest task feel overwhelming. But fear not, fellow DIYers! It’s time to ditch the disorganized mess and embrace a functional toolbox organization system that will have you saying, "Where did that extra hour come from?"

This guide will take you through a variety of toolbox organizer ideas for every budget, from clever hacks to dedicated systems. Whether you're a seasoned pro or a weekend warrior, we've got you covered.

DIY Toolbox Organizers: Unleash Your Creativity

Who says organization has to be expensive? With a little creativity and some recycled materials, you can whip up a DIY toolbox organizer that works wonders for your tools.

Repurposed Containers

Take a look around your house for containers that can be transformed into tool organizers. Think empty plastic tubs, shoeboxes, or even those pesky cardboard tubes from wrapping paper!

  • Plastic containers are great for holding small items like screws, nuts, and bolts. You can even label them with masking tape or permanent markers for easy identification.
  • Shoeboxes can be repurposed into dividers for larger tools, helping you keep your hammers, screwdrivers, and pliers separated.
  • Cardboard tubes can be sliced and used to store drill bits, screwdrivers, or other long tools.

Magnetic Strips

Magnetic strips are a lifesaver for organizing metal tools. Simply attach the strip to the inside of your toolbox lid or to a wall, and let your tools magically hang themselves in place.

Pro tip: You can even attach magnetic strips to the back of a toolbox drawer to keep your tools accessible and organized.

Affordable Toolbox Organizers

For those who prefer ready-made solutions without breaking the bank, there are plenty of affordable options available.

Tool Trays and Dividers

Tool trays and dividers are a simple yet effective way to keep your toolbox organized. They come in various sizes and materials, allowing you to customize your storage needs.

Drawer Organizers

Drawer organizers are a great solution for smaller tools and accessories. You can find a wide array of drawer organizers in different materials like plastic, metal, or wood, and they can often be customized to fit your specific toolbox drawers.

High-End Toolbox Organizers

If you're looking for a top-of-the-line toolbox organization solution that's built to last, consider investing in specialized organizers from reputable brands.

Rolling Tool Cabinets

Rolling tool cabinets are ideal for professionals and serious DIY enthusiasts. They offer ample storage space and are equipped with drawers, shelves, and sometimes even a work surface. Many models feature ball-bearing slides for smooth operation and heavy-duty construction for long-lasting use.

Modular Tool Storage Systems

Modular tool storage systems are highly customizable and can adapt to your specific needs. These systems typically include a variety of bins, drawers, and shelves that can be combined and rearranged to create the perfect storage solution. Many systems are compatible with a range of tool brands, ensuring that all your tools have a designated home.

Organization Tips to Keep Your Toolbox Tidy

Once you've chosen your organizer system, it's time to put your organization skills to the test. Here are a few tips to help you keep your toolbox tidy:

  • Clean it out: Before organizing, take the time to give your toolbox a thorough cleaning. Remove any dust, debris, or unused items that are taking up precious space.
  • Categorize your tools: Group similar tools together. For example, you could have a section for wrenches, another for screwdrivers, and so on. This will make it easier to locate the tool you need.
  • Use labels: Label containers, drawers, and sections to make it easy to find your tools. You can use adhesive labels, masking tape, or even permanent markers.
  • Keep it tidy: Make a habit of putting tools away immediately after use. This will help to prevent clutter and keep your toolbox organized.

Commonly Asked Questions

Q: What's the best way to organize small tools?

A: For small tools like screws, nuts, and bolts, consider using containers like plastic tubs, tackle boxes, or even egg cartons. You can label them to easily identify the contents.

Q: How do I organize long tools like screwdrivers and drill bits?

A: Long tools can be stored in vertical organizers, drawers with dividers, or even in cardboard tubes.

Q: What if I don't have a lot of space?

A: Even if you have limited space, you can still organize your toolbox effectively. Consider using wall-mounted organizers, hanging tool racks, or even repurposed containers to maximize your storage space.

Q: Should I invest in a high-end toolbox organizer?

A: The decision depends on your budget and needs. If you use your toolbox frequently and require a durable and customizable solution, investing in a high-end organizer might be worthwhile. However, there are plenty of affordable and effective options available as well.

Remember, organization is a journey, not a destination. The key is to find a system that works for you and that you can maintain. So go forth, DIYers, and create a toolbox that's as efficient and satisfying as your projects!

Read More..

Toolbox Organizers with Compartments for Extra Storage

Toolbox Organizers with Compartments for Extra Storage

Maximize Your Toolbox Efficiency with Compartmentalized Organizers

Are you tired of rummaging through a chaotic toolbox, wasting precious time searching for the right tool? A well-organized toolbox is a game-changer for any DIY enthusiast, professional, or simply someone who values efficiency. Enter the realm of toolbox organizers with compartments â€" a solution that transforms your toolbox from a jumbled mess into a haven of order and accessibility.

Why Choose Compartmentalized Organizers?

Toolbox organizers with compartments offer numerous advantages that elevate your tool management experience:

Enhanced Organization and Efficiency

Imagine a toolbox where every tool has its designated spot. No more digging through piles of screwdrivers or hunting for that elusive wrench. Compartmentalized organizers create a system of order, allowing you to locate the tool you need instantly, saving you time and frustration.

Improved Tool Protection

Tools are often delicate instruments that require proper storage. Individual compartments prevent tools from clanging against each other, reducing the risk of damage and ensuring their longevity.

Increased Storage Capacity

Compartmentalized organizers make the most of your toolbox space. They maximize storage capacity by utilizing every nook and cranny, allowing you to carry a wider range of tools without sacrificing organization.

Types of Compartmentalized Organizers

The world of toolbox organizers offers a variety of options to suit your needs. Here are some popular types:

Drawers

Drawer organizers are perfect for storing smaller tools like screwdrivers, sockets, and bits. The drawers provide a secure and easily accessible way to keep these essentials organized.

Trays

Trays with individual compartments are ideal for larger tools like wrenches, pliers, and hammers. They allow for easy viewing and selection of tools, ensuring you can grab the right one quickly.

Roll-Up Organizers

Roll-up organizers are a great option for mobile toolkits. These organizers compactly roll up and have various pockets and compartments for holding tools of different sizes.

Tips for Choosing the Right Organizer

To select the perfect organizer for your toolbox, consider the following factors:

  • Size and Dimensions of Your Toolbox: Measure your toolbox to ensure the organizer fits comfortably and doesn't take up too much space.
  • Type of Tools You Need to Store: Think about the size and shape of your tools and choose an organizer with compartments that accommodate them.
  • Material: Consider the material of the organizer. Durable and impact-resistant materials like plastic or metal are ideal for protecting your tools.
  • Budget: Toolbox organizers come in a range of prices. Set a budget and look for an organizer that offers the features you need within your price range.

Conclusion

Investing in a compartmentalized toolbox organizer is an investment in your time, efficiency, and the longevity of your tools. By creating a system of order within your toolbox, you'll save time, reduce frustration, and enjoy a more productive experience whether you're a seasoned professional or a weekend DIYer.

Read More..

Simple Wine Rack Projects That Look Expensive

Simple Wine Rack Projects That Look Expensive

Simple Wine Rack Projects That Look Expensive

A well-stocked wine collection deserves a home as elegant as its contents. But who says that a stunning wine rack must come with a hefty price tag? With a little creativity and the right materials, you can build a simple wine rack that will impress your guests and add a touch of sophistication to your home.

This guide will explore several simple wine rack projects that appear expensive but are surprisingly affordable to build. We'll cover various styles, materials, and construction techniques to inspire your DIY journey.

Choosing Your Materials

The right materials are crucial for creating a wine rack that looks both stylish and durable. Consider these options:

Wood

  • Reclaimed wood: Adds a rustic charm and eco-friendly touch. Look for salvaged planks, pallets, or even old furniture.
  • Pine: A budget-friendly choice that accepts stain and paint well. Consider knotty pine for a more rustic look.
  • Maple or Cherry: Offers a rich, natural beauty and stands up to wear and tear. These options are more expensive but worth considering for a long-lasting piece.

Metal

  • Iron: Provides a strong and industrial aesthetic. You can find pre-made iron rods or sheets for your rack.
  • Copper: Creates a warm, elegant look and develops a beautiful patina over time. Copper pipes are a popular choice for simple rack designs.

Acrylic

  • Clear Acrylic: Creates an invisible, modern aesthetic. You can find pre-cut acrylic sheets at most hardware stores.

Easy and Affordable Wine Rack Designs

Here are some simple wine rack projects that you can tackle with basic tools and skills.

Simple Wooden Rack

  • Materials: Pine boards, wood glue, screws, stain or paint (optional)
  • Construction: Cut the boards into desired lengths. Use wood glue and screws to attach the boards together to form a rectangular frame. Add horizontal support pieces to create bottle slots. Finish with stain or paint for a custom look.
  • Cost: $10-$25 (depending on wood type)

Industrial Pipe Rack

  • Materials: Iron pipe, pipe fittings, brackets, wood (optional)
  • Construction: Cut the pipe to desired lengths and use fittings to create a framework. You can mount the rack directly to a wall or use wood boards for a more robust base.
  • Cost: $20-$40 (depending on pipe size)

Floating Wine Rack

  • Materials: Wooden dowels, brackets, screws, wood stain or paint (optional)
  • Construction: Attach brackets to the wall and insert wooden dowels to create slots for bottles. For a more substantial look, you can add wood boards behind the dowels. Finish with stain or paint for a customized look.
  • Cost: $15-$30 (depending on dowel size)

Acrylic Wine Display

  • Materials: Acrylic sheets, glue, wood (optional)
  • Construction: Cut the acrylic sheets to form a rectangular frame. Use glue to connect the sheets. You can add a wooden base for support or mount the acrylic rack directly to the wall.
  • Cost: $20-$50 (depending on acrylic thickness)

Tips for a Professional Look

To elevate your DIY wine rack from ordinary to extraordinary, follow these tips:

  • Choose high-quality materials: Invest in good wood, metal, or acrylic to ensure durability and a refined appearance.
  • Sanding and finishing: Take the time to sand your wood surfaces smooth and apply a high-quality finish, such as stain, paint, or varnish.
  • Hardware and fixtures: Use sturdy brackets, screws, and hinges for a secure and polished look.
  • Customization: Add personal touches like decorative accents, carved details, or metal accents to create a unique and stylish wine rack.
  • Lighting: Highlight your wine collection with strategically placed spotlights or LED strips for an added touch of elegance.

Conclusion

Creating a simple, inexpensive wine rack that looks expensive is a rewarding DIY project. By choosing the right materials, following easy construction steps, and adding finishing touches, you can craft a beautiful and functional piece that enhances your home's decor and showcases your wine collection with pride. Remember, the most expensive-looking wine racks are those that reflect your unique style and personal touch.

Read More..

Easy DIY Wood Gifts That Are Perfect for Selling

Easy DIY Wood Gifts That Are Perfect for Selling

Easy DIY Wood Gifts That Are Perfect for Selling

Are you looking for a creative and profitable way to make some extra cash? Consider crafting easy DIY wood gifts that are sure to delight customers. Woodworking offers a wide range of possibilities, from simple to elaborate, allowing you to cater to various tastes and budgets. With a little bit of effort and the right tools, you can transform ordinary wood into beautiful and functional pieces that people will cherish for years to come.

The Benefits of Selling DIY Wood Gifts

Selling DIY wood gifts comes with several advantages. First, you can tap into a growing market of individuals seeking unique and personalized gifts. Second, you have complete control over the design, materials, and quality of your products, allowing you to create items that truly reflect your artistic vision. Third, woodworking is a rewarding hobby that can be both therapeutic and profitable. And lastly, the materials and tools needed for basic woodworking projects are relatively inexpensive, making it an accessible craft for beginners.

Easy DIY Wood Gift Ideas

Personalized Wooden Coasters

Start with a simple project like personalized wooden coasters. Choose a beautiful wood like cherry, maple, or walnut, and cut the wood into squares or circles. Use a laser engraver to add custom designs, names, or initials, creating unique coasters that customers will love. You can also personalize the coasters by adding decorative elements like inlays or epoxy resin.

Rustic Wooden Signs

Rustic wooden signs are another popular choice for DIY wood gifts. Use reclaimed wood or rough-cut lumber to create signs for various occasions, such as birthdays, weddings, or housewarming parties. Paint the signs with vibrant colors or leave them natural, adding a touch of rustic charm. Customize the signs with phrases, quotes, or decorative elements to make them truly unique.

Handmade Wooden Ornaments

Embrace the holiday spirit by crafting adorable wooden ornaments. Cut out shapes like stars, hearts, or snowflakes using a jigsaw or scroll saw. Decorate the ornaments with paint, glitter, or fabric scraps. You can also add embellishments like ribbons or buttons for a more personalized touch. These ornaments are perfect for adding a handmade charm to Christmas trees, wreaths, or gift packages.

Wooden Cutting Boards

Practical and aesthetically pleasing, wooden cutting boards make excellent gifts. Select a durable wood like maple or walnut and cut it to the desired size and shape. Sand the board thoroughly and finish it with food-safe oil to protect it from moisture and bacteria. You can add a personal touch by engraving the board with a name, date, or special message.

Wooden Serving Trays

Create functional and beautiful wooden serving trays. Use plywood or a solid wood like oak to build the base. You can add decorative details like handles, grooves, or inlays. Sand the tray thoroughly and finish it with a clear coat to protect it from spills and scratches. Wooden serving trays are perfect for serving snacks, drinks, or appetizers at parties and gatherings.

Tips for Selling Your DIY Wood Gifts

To successfully sell your handmade wooden gifts, consider the following tips:

  • Create a strong online presence. Set up an Etsy shop, create a website, or use social media platforms like Instagram or Facebook to showcase your products and attract potential customers.
  • Take high-quality photos of your work. Professional-looking photos will entice customers and make your gifts stand out from the competition.
  • Offer personalized options. Allow customers to customize their gifts with initials, names, or special messages, adding a personal touch and increasing their value.
  • Provide excellent customer service. Respond promptly to inquiries, package your products carefully, and offer a hassle-free return policy to build trust and loyalty with your customers.
  • Promote your products at local craft fairs and markets. These events provide a great opportunity to interact with potential customers face-to-face and showcase your unique wood crafts.

With a little creativity, hard work, and the right marketing strategies, you can turn your passion for woodworking into a profitable business. Selling DIY wood gifts offers a rewarding way to share your talents, connect with customers, and generate income from your love of creating beautiful and functional pieces.

Read More..

Easy DIY Cold Frame from Scratch

Easy DIY Cold Frame from Scratch

Easy DIY Cold Frame from Scratch

A cold frame is a simple, yet invaluable tool for gardeners of all levels. It extends the growing season, allowing you to start seeds earlier in the spring, protect delicate plants during the winter, and even harden off seedlings before transplanting them into the garden. Building your own cold frame from scratch offers a sense of accomplishment, allows for customization to your needs, and can be a cost-effective solution.

Benefits of Using a Cold Frame

Cold frames provide a controlled environment that enhances plant growth and survival. They offer several benefits:

Extended Growing Season:

Cold frames trap solar heat, creating a microclimate warmer than the ambient air, allowing you to start seeds or transplant seedlings several weeks earlier in the spring.

Protection from Harsh Weather:

They shelter plants from frost, strong winds, and heavy rain, safeguarding delicate seedlings and extending the lifespan of your garden throughout the colder months.

Improved Seedling Success:

Cold frames offer a controlled environment for starting seeds. By providing consistent warmth and moisture, you can achieve a higher germination rate and healthier seedlings.

Hardening Off Seedlings:

Before transplanting seedlings outdoors, they need to adjust to the harsh conditions. A cold frame acts as a transitional environment, gradually acclimating them to direct sunlight and wind.

Cost-Effective Solution:

Building your own cold frame can be significantly less expensive than purchasing a pre-made one. This allows you to customize the size and design to your needs.

Materials Needed

You can build a simple cold frame using readily available materials. Here's a list of what you'll need:

  • Wood: 2x4s or 1x6s (for the frame and supports)
  • Plywood or polycarbonate sheeting: For the lid
  • Hinges: For attaching the lid to the frame
  • Screws or nails:
  • Paint or sealant: To protect the wood
  • Optional: Insulation, window glazing, and hardware cloth for ventilation

Steps for Building a Cold Frame

Follow these simple steps to construct your cold frame:

1. Determine the Size and Location:

The size of your cold frame will depend on your needs and available space. A standard size is 4 feet wide by 6 feet long, but you can adjust these dimensions to fit your garden. Choose a sunny location with good drainage. Ensure the site is level and free of obstructions.

2. Build the Frame:

Cut the wood to create the frame's perimeter. Use a saw and level to ensure precise cuts. Assemble the frame using screws or nails, ensuring the corners are square and secure. The frame can be rectangular, square, or even a more complex shape, depending on your preference.

3. Construct the Lid:

For a simple lid, cut a sheet of plywood or polycarbonate to match the size of the frame. Secure the lid material to a frame using screws or nails. If using polycarbonate, you may want to use a glazing tape to seal the edges.

4. Attach the Lid to the Frame:

Install hinges on one side of the lid and attach it to the frame. You can use either two or three hinges, depending on the size of the lid. Ensure the hinges allow for easy opening and closing.

5. Add Insulation and Ventilation (Optional):

For extra insulation, line the inside of the frame with foam board or bubble wrap. You can also create ventilation by adding hardware cloth to the bottom of the lid or by cutting a small vent in the lid. Ventilation helps regulate the temperature inside the cold frame.

6. Paint or Seal the Wood:

Apply paint or sealant to the wood frame and lid to protect them from moisture and the elements. Choose a weather-resistant paint or sealant that will last for years.

7. Position the Cold Frame:

Place the cold frame in its designated location. Ensure it's level and secure to prevent shifting or tipping over in strong winds.

8. Prepare the Growing Medium:

Fill the cold frame with a suitable growing medium, such as potting mix, compost, or a mixture of both. The medium should be loose and well-draining.

Tips for Using Your Cold Frame

Once your cold frame is built, follow these tips for optimal performance:

  • Monitor Temperature: Use a thermometer to monitor the temperature inside the cold frame. Ideal temperatures for seedlings range from 60 to 70 degrees Fahrenheit. Adjust the lid position to control the temperature.
  • Provide Adequate Ventilation: Open the lid during the day to allow fresh air circulation and prevent overheating. Close the lid at night to trap warmth and protect plants from frost.
  • Water Regularly: Keep the growing medium consistently moist, but avoid overwatering. Check the soil moisture daily and water as needed.
  • Protect from Pests and Diseases: Use row covers or netting to deter pests and diseases. Regular inspection can also help identify any issues early on.
  • Hardening Off Seedlings: Once seedlings have reached a suitable size, start hardening them off by gradually exposing them to outdoor conditions for increasing periods each day. This acclimates them to the harsh weather and prepares them for transplanting.

Conclusion

Building your own cold frame from scratch is a rewarding project that can significantly benefit your gardening endeavors. With a little time and effort, you can create a durable, customizable structure that will extend your growing season, improve seedling success, and enhance your overall gardening experience.

Read More..

Build a Cold Frame: DIY Guide and PDF

Build a Cold Frame: DIY Guide and PDF

Build a Cold Frame: DIY Guide and PDF

A cold frame is a simple, yet highly effective structure that extends your gardening season by providing a protected and controlled environment for plants. It acts as a mini-greenhouse, trapping solar heat and shielding your plants from harsh weather conditions. Building your own cold frame offers numerous advantages, including cost savings, customized design options, and the satisfaction of creating something yourself.

This comprehensive guide will walk you through the steps of building a cold frame, complete with detailed instructions, material lists, and a downloadable PDF for your convenience.

Choosing the Right Location

The location of your cold frame is crucial for its success. Consider the following factors when selecting a spot:

Sunlight

Cold frames require ample sunlight, ideally a south-facing location that receives at least 6 hours of direct sunlight daily. Avoid shady areas or locations blocked by trees or buildings.

Drainage

Proper drainage is essential to prevent waterlogging and root rot. Choose a site with well-drained soil or create a raised bed for better drainage.

Accessibility

Ensure easy access to your cold frame for planting, tending, and harvesting. Position it near a water source and a path for convenient movement.

Materials and Tools

Before you begin, gather the necessary materials and tools. You can customize the design and materials based on your preferences and budget. Here's a suggested list:

Materials

  • Framing Material: Cedar, redwood, pressure-treated lumber, or recycled pallets (check for chemical treatments)
  • Glazing: Clear polycarbonate panels, glass panes, or recycled windows
  • Fasteners: Screws, nails, and brackets
  • Sealant: Silicone caulk or weather stripping
  • Soil: Potting mix or garden soil
  • Optional: Hinge for lid, latch for security, ventilation system

Tools

  • Saw (circular, jigsaw, or hand saw)
  • Drill
  • Screwdriver
  • Level
  • Measuring tape
  • Pencil
  • Safety glasses and gloves

Building the Cold Frame

Follow these step-by-step instructions to build your cold frame:

Step 1: Design and Cut the Framing

Determine the size of your cold frame based on the space available and your planting needs. Consider the dimensions of the glazing material you plan to use. Cut the framing material to the desired lengths using a saw, ensuring precise measurements.

Step 2: Assemble the Base

Join the framing pieces to form the base of the cold frame. Secure the joints using screws or nails, ensuring a sturdy and square construction. Use a level to ensure the base is flat and level.

Step 3: Construct the Sides and Back

Cut and attach the side and back panels to the base. Make sure the sides are vertical and aligned. You can use corner brackets for added strength and stability.

Step 4: Install the Lid

Build the lid using the same framing material. Attach it to the base using hinges for easy opening and closing. Consider incorporating a latch or a locking mechanism for security.

Step 5: Add the Glazing

Secure the glazing material to the frame using screws or brackets. Apply sealant around the edges to prevent leaks and ensure a tight seal. For glass, you may need to use glazing points for a professional look and secure hold.

Step 6: Finish and Prepare for Planting

Apply a finishing coat of paint or stain to protect the wood from weathering. Fill the cold frame with soil, making sure to choose a mix that suits the plants you will be growing.

Tips for Success

Here are some essential tips to maximize the effectiveness of your cold frame:

  • Ventilation: Provide adequate ventilation by opening the lid on sunny days or using vents for air circulation. This prevents overheating and promotes healthy plant growth.
  • Temperature Monitoring: Regularly check the temperature inside the cold frame, especially during extreme weather conditions. Use a thermometer to maintain an optimal temperature range for your plants.
  • Watering: Water plants as needed, ensuring the soil is adequately moist but not waterlogged. Overwatering can lead to root problems.
  • Hardening Off: Gradually acclimate your plants to outdoor conditions before transplanting them permanently. This prevents shock and improves their survival rate.
  • Winter Protection: Add extra insulation to your cold frame during winter by covering the glazing with blankets or bubble wrap to retain heat.

Benefits of a Cold Frame

Building a cold frame offers several benefits to gardeners:

  • Extended Growing Season: Start seeds earlier in the spring and extend the harvest into the fall.
  • Protection from Harsh Weather: Shield your plants from frost, wind, and heavy rain.
  • Improved Plant Growth: Create a controlled environment with warmer temperatures and increased humidity.
  • Cost-Effective Solution: Build a cold frame for a fraction of the cost of a greenhouse.
  • Environmental Benefits: Reduce water usage and promote sustainable gardening practices.

Downloadable PDF Guide

For your convenience, we've created a downloadable PDF version of this guide, containing all the instructions, materials list, and tips for building your cold frame. Click the link below to access the PDF:

[Insert Link to PDF Download]

Conclusion

Building a cold frame is a rewarding project that empowers you to extend your gardening season and grow healthier, more productive plants. By following these detailed instructions, you can create a customized structure that meets your specific needs and budget. With careful planning and construction, your cold frame will become a valuable addition to your garden, enhancing your gardening experience for years to come.

Read More..

Simple Compost Bin Projects You Can Build Today

Simple Compost Bin Projects You Can Build Today

Simple Compost Bin Projects You Can Build Today

Composting is a fantastic way to reduce waste, enrich your garden soil, and contribute to a more sustainable lifestyle. Building your own compost bin allows you to customize it to your needs and provides a rewarding DIY project. Here are some simple compost bin projects you can build today, using readily available materials:

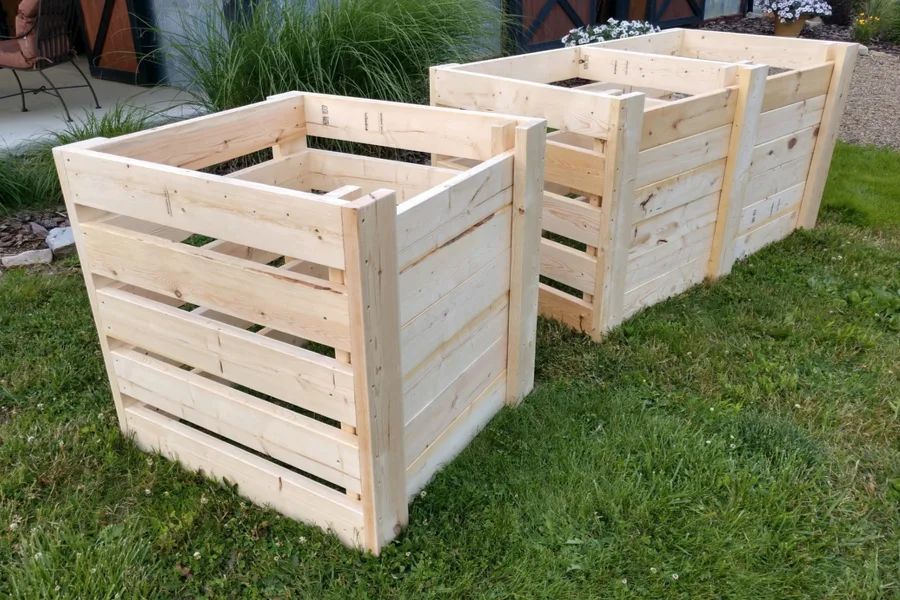
Pallet Compost Bin

Pallet compost bins are a popular choice for their affordability and ease of construction. You can find pallets for free or at a low cost from local businesses.

Materials

  • Two wooden pallets
  • Screws or nails
  • Power drill or hammer
  • Optional: Wire mesh or hardware cloth for ventilation

Instructions

  1. Prepare the pallets: Remove any loose nails or staples and sand down any rough edges. You may want to clean the pallets with a pressure washer for a more aesthetically pleasing look.
  2. Assemble the bin: Place the pallets parallel to each other, leaving a gap of about 12 inches between them for air circulation. Secure the pallets together with screws or nails.
  3. Add ventilation: If desired, attach wire mesh or hardware cloth to the sides of the bin to enhance airflow.
  4. Optional: Create a lid for the bin using a third pallet or plywood.

Three-Bin Compost System

A three-bin compost system offers a convenient way to manage different stages of composting. You can have one bin for fresh scraps, one for active composting, and one for finished compost.

Materials

  • Six wooden planks (8 feet long)
  • Four wooden posts (4 feet long)
  • Screws or nails
  • Power drill or hammer
  • Optional: Wire mesh or hardware cloth for ventilation

Instructions

  1. Build the frames: Use the wooden planks to create three rectangular frames, each about 3 feet wide and 3 feet long. Secure the corners with screws or nails.
  2. Attach the posts: Attach the wooden posts to the corners of each frame, using screws or nails. Ensure the posts are spaced to create three compartments.
  3. Optional: Add ventilation to each bin by attaching wire mesh or hardware cloth to the sides.
  4. Finishing touches: You can add a decorative element like a trellis or a raised edge.

Tumbling Compost Bin

Tumbling compost bins are ideal for producing compost quickly because they provide constant aeration. They are also relatively small and can be easily moved around your garden.

Materials

  • Two 55-gallon drums
  • Hinge hardware
  • Screws or nails
  • Power drill or hammer
  • Optional: Metal handles for easy turning

Instructions

  1. Prepare the drums: Clean the drums thoroughly and remove any labels. Drill several drainage holes in the bottom of each drum. Drill a few ventilation holes in the sides of each drum.
  2. Attach the hinges: Attach the hinges to the top of one drum and the bottom of the other drum.
  3. Secure the drums: Attach the two drums together using screws or nails, ensuring they are securely hinged.
  4. Add handles: If desired, attach handles to the side of the drum for easier turning.

DIY Compost Bin Tips

Here are some tips to ensure successful composting:

  • Location: Choose a location that is shaded, well-drained, and easily accessible. A slight slope can aid with drainage.
  • Brown to Green Ratio: Maintain a balanced ratio of "brown" materials (carbon-rich, like leaves and twigs) to "green" materials (nitrogen-rich, like kitchen scraps and grass clippings). A general rule of thumb is a 2:1 ratio of brown to green.
  • Moisture: The compost should be moist, but not soggy. Add water as needed, especially during dry weather.
  • Turning: Turn the compost regularly to ensure adequate aeration and breakdown.
  • Patience: Composting takes time. It can take anywhere from several weeks to several months for compost to break down fully.

Additional Considerations for Building Your Compost Bin

Beyond the simple design, consider these factors for your compost bin project:

  • Aesthetics: If you want a more visually appealing compost bin, consider using treated lumber or painting the wood.
  • Size: Determine the size of your compost bin based on your needs and the amount of material you plan to compost.
  • Accessibility: Make sure the bin is easy to access for adding materials and turning the compost.

Building your own compost bin is a fun and rewarding project. You'll not only save money on purchasing a pre-made compost bin but also get to enjoy the satisfaction of knowing that you're creating something useful for your garden. With a little effort and creativity, you can create a simple compost bin that meets your needs and adds a touch of eco-friendly charm to your backyard.

Read More..

Step-by-Step Plans to Build a Squirrel Den Box

Step-by-Step Plans to Build a Squirrel Den Box

Build a Cozy Squirrel Den Box

Are you looking for a fun and rewarding DIY project that will bring joy to your backyard? Building a squirrel den box is a great way to provide shelter for these adorable creatures and observe their fascinating habits up close. With a few simple materials and some basic carpentry skills, you can create a welcoming home for your local squirrel population.

Gather Your Materials

Before you start building, ensure you have all the necessary materials. Here’s what you’ll need:

  • Wood: Choose a durable and weather-resistant wood like cedar, redwood, or pressure-treated pine. You will need 1 x 6 boards for the sides and roof, a 1 x 4 board for the base, and a 1 x 2 board for the trim.
  • Screws: Use 1 1/2-inch or 2-inch wood screws for assembling the box.
  • Saw: A circular saw or a handsaw will help you cut the wood to size.
  • Drill: A drill with a drill bit that matches your screws will make it easier to assemble the box.
  • Measuring tape: Accurate measurements are crucial for creating a well-fitting box.
  • Level: Ensure the box is level for stability.
  • Hammer: You may need a hammer to help with certain steps.
  • Safety Glasses: Always wear safety glasses when working with wood and power tools.

Constructing the Squirrel Den Box

Now that you have gathered your materials, it’s time to build the squirrel den box! Follow these detailed steps:

Cutting the Wood

Start by cutting the wood according to the following dimensions:

  • Sides: Two pieces of 1 x 6 board, 12 inches long each.
  • Back: One piece of 1 x 6 board, 12 inches long.
  • Front: One piece of 1 x 6 board, 12 inches long.
  • Roof: Two pieces of 1 x 6 board, 14 inches long each.
  • Base: One piece of 1 x 4 board, 12 inches long.
  • Trim: Two pieces of 1 x 2 board, 12 inches long each.

It's recommended to add a 1/4-inch overhang to the roof boards to prevent water from dripping inside the box. To achieve this, cut the roof boards 1/4 inch longer than the box width (14 inches) to create the overhang.

Assembling the Box

Now it’s time to assemble the squirrel den box. Follow these steps:

  1. Assemble the Base: Attach the two side boards to the base board using screws. Ensure the side boards are flush with the base board and that the base is level.
  2. Attach the Back: Attach the back board to the sides, ensuring it’s flush with the base and the sides.
  3. Attach the Front: Attach the front board to the sides, ensuring it’s flush with the base and the sides.
  4. Attach the Roof: Place the roof boards on top of the box, with the overhang extending past the sides. Attach the roof boards to the sides using screws. You might need to use a level to ensure the roof is straight and secure.
  5. Add Trim: Attach the trim pieces to the front and back of the box, concealing the rough edges of the wood and creating a more finished look. This step is optional, but it enhances the box's appearance and durability.

Adding a Entrance Hole

The next step is to add an entrance hole to your squirrel den box. Use a drill or saw to cut a 3-inch diameter hole near the center of the front board. This will be the entrance point for the squirrels.

Finishing Touches

To add some extra protection and enhance the lifespan of the squirrel den box, consider these final steps:

  • Paint or Stain: Paint the outside of the box with a weather-resistant paint or stain to protect the wood and prevent moisture damage.
  • Ventilation: Drill a few small ventilation holes on the sides of the box to allow for proper air circulation inside.
  • Optional Roof Shingles: For added weather protection, you can attach a few layers of asphalt shingles to the roof using construction adhesive and nails.

Installing the Squirrel Den Box

Choose a suitable location for your squirrel den box. It’s best to place it in a sheltered area with a bit of overhead cover for shade and protection from the elements. You can mount it on a sturdy tree branch or attach it to a fence post with strong brackets.

It's important to secure the box to its chosen location to ensure it remains stable and safe for the squirrels. Don't forget to keep the box at a height that allows for easy access for the squirrels, and place it close enough to branches or trees for them to easily navigate and access the box.

Enjoy Watching Your New Backyard Guests

Congratulations! You have now successfully built a cozy squirrel den box that will provide a safe and comfortable home for the squirrels in your area. Once you have installed the box, keep an eye out for your new backyard guests. You might be lucky enough to witness the squirrels exploring their new home, building nests, and enjoying the cozy shelter you have provided.

Building a squirrel den box is a rewarding and enjoyable project for anyone who enjoys spending time outdoors. It's a great way to connect with nature and contribute to the well-being of your local wildlife.

Read More..

Build a Custom Bedside Cabinet with These Free PDF Plans

Build a Custom Bedside Cabinet with These Free PDF Plans

Build a Custom Bedside Cabinet with These Free PDF Plans

Elevate your bedroom's ambiance and functionality with a handcrafted bedside cabinet. These free PDF plans provide a comprehensive guide to constructing a stylish and practical piece of furniture that seamlessly integrates with your existing décor.

Design Considerations

Before embarking on the construction process, carefully consider the following design elements to ensure a cohesive and functional bedside cabinet:

Style

Choose a style that complements your bedroom's aesthetic. Options include:

  • Modern: Clean lines, minimalist design, and sleek materials.
  • Traditional: Ornate details, intricate carvings, and classic wood finishes.
  • Rustic: Unfinished or distressed wood, salvaged materials, and a rugged appeal.

Size

Measure the available space beside your bed and determine the ideal dimensions for your cabinet. Consider the following factors:

  • Width: Ensure sufficient space for a nightstand lamp, books, and other essentials.
  • Height: Select a height that allows for comfortable access to the top surface.
  • Depth: Choose a depth that provides adequate storage without overwhelming the space.

Materials

The choice of materials will significantly impact the cabinet's appearance and durability:

  • Wood: Popular options include oak, maple, cherry, and pine. Each wood species offers unique grain patterns and durability.
  • Metal: Metal accents, such as handles, hinges, and legs, can add a modern or industrial touch.
  • Glass: Glass shelves or doors create a sense of openness and allow for showcasing decorative items.

Required Tools and Materials

To bring your bedside cabinet to life, gather the necessary tools and materials. These may vary depending on the specific design and complexity of the project. Common tools include:

  • Saw: For cutting wood to size. A table saw or circular saw is recommended.
  • Drill: For creating holes for screws, hinges, and drawer slides.
  • Screwdriver: For assembling the cabinet.
  • Sandpaper: For smoothing out rough edges and preparing the wood for finishing.
  • Clamps: For securing pieces of wood during assembly.
  • Measuring tape: For ensuring accurate dimensions.
  • Level: For ensuring the cabinet is plumb and straight.

Materials typically include:

  • Wood planks of various dimensions based on the design.
  • Screws for assembling the frame and attaching hardware.
  • Wood glue for reinforcing joints.
  • Drawer slides, if applicable.
  • Hinges for doors, if applicable.
  • Handles, knobs, or pulls.
  • Wood finish (stain, paint, or sealant) for protecting and enhancing the wood.

Steps for Building the Bedside Cabinet

The free PDF plans will provide detailed instructions and diagrams to guide you through each step of the construction process. However, here's a general overview of the typical steps involved:

Cutting the Wood

Begin by carefully cutting the wood planks according to the dimensions specified in the plans. Use a saw, such as a table saw or circular saw, to achieve precise cuts.

Assembling the Frame

Assemble the cabinet's frame by joining the cut wood pieces together. Use wood glue and screws to secure the joints, ensuring they are strong and durable.

Adding Shelves and Drawers

If your design includes shelves or drawers, install them within the cabinet frame. Use drawer slides for smooth-operating drawers and secure shelves with screws.

Attaching Doors or Panels

If your cabinet features doors or panels, attach them to the frame using hinges. Ensure the doors open and close smoothly and securely.

Installing Hardware

Install any necessary hardware, such as handles, knobs, and pulls. Make sure they are securely attached and aesthetically pleasing.

Finishing the Cabinet

Apply a wood finish, such as stain, paint, or sealant, to protect the wood and enhance its appearance. Allow the finish to dry completely before handling the cabinet.

Customization and Personalization

Once the basic construction is complete, personalize your bedside cabinet to reflect your individual style and preferences. Consider adding the following elements:

  • Embellishments: Include decorative accents, such as moldings, trim, or carving, to enhance the cabinet's aesthetics.
  • Lighting: Incorporate built-in lighting, such as a small LED strip, for added functionality and ambiance.
  • Storage Solutions: Add specialized storage compartments or organizers for specific items, such as jewelry or makeup.

Conclusion

Building a custom bedside cabinet from free PDF plans empowers you to create a unique piece of furniture that perfectly complements your bedroom's décor. By following the detailed instructions and diagrams, you can transform your woodworking skills into a stylish and functional addition to your home.

Read More..

Creative Uses for a DIY Bedside Cabinet in Your Home

Creative Uses for a DIY Bedside Cabinet in Your Home

Creative Uses for a DIY Bedside Cabinet in Your Home

In the realm of interior design, versatility reigns supreme. While traditional bedside cabinets serve their purpose admirably, the DIY spirit encourages exploration beyond the ordinary. A well-crafted, personalized bedside cabinet can transform into a multifaceted piece of furniture, seamlessly blending functionality with aesthetics.

This exploration delves into the creative uses of a DIY bedside cabinet, showcasing its potential beyond its intended purpose. From practical storage solutions to captivating decorative accents, a homemade bedside cabinet can become an indispensable element in various areas of your home.

Unleashing the Potential: Beyond the Bedroom

The beauty of a DIY bedside cabinet lies in its adaptability. The same principles that guide its construction in the bedroom can be applied to other spaces, infusing them with a unique charm. Let us explore some unconventional uses:

A Corner Apothecary

Transform a bedside cabinet into a captivating apothecary corner in your bathroom. The cabinet's drawers can house essential oils, bath salts, and beauty products, while the top surface provides a stylish platform for displaying decorative elements. Embellish the cabinet with vintage jars and labels to enhance the apothecary aesthetic, creating a spa-like ambiance in your bathroom.

A Mini-Library in Your Living Room

Create a cozy reading nook by repurposing a bedside cabinet as a mini-library. The drawers can accommodate favorite novels, while the top surface can showcase a cherished collection of books. Adding a small reading lamp and a comfortable chair completes the picture, transforming your living room into a literary haven.

A Functional Kitchen Island

In a small kitchen, a DIY bedside cabinet can be repurposed as a functional kitchen island. The drawers offer ample storage for utensils, cookware, or pantry items. The top surface provides additional counter space for meal preparation or serving. A small bar stool can be placed beside the cabinet to create a breakfast nook, enhancing the kitchen's utility and aesthetic appeal.

A Decorative Entryway Console

Welcome guests with an inviting entryway by repurposing a bedside cabinet as a console. The cabinet's drawers can store keys, mail, or other essentials, while the top surface can showcase a decorative vase, a framed photo, or a small mirror. Choose a cabinet with an elegant design to elevate the entryway's visual appeal.

Elevating the Bedroom Experience

While the potential applications of a DIY bedside cabinet extend beyond the bedroom, its core functionality remains central to this space. Explore creative ways to enhance its utility and aesthetic appeal within your sleep sanctuary.

A Personalized Nightstand

Start with the basics: a personalized nightstand. Customize the cabinet's finish, paint it a bold color, or adorn it with decorative hardware to match your bedroom's decor. The drawers can house books, reading glasses, and other bedside essentials, while the top surface can display a cherished photo frame, a small lamp, or a fragrant candle.

A Multimedia Hub

In the digital age, a bedside cabinet can transform into a multimedia hub. Incorporate a power outlet within the cabinet's structure to conveniently charge your phone, tablet, or e-reader. The top surface can accommodate a small speaker, a tablet stand, or a charging dock for seamless access to entertainment.

A Cozy Reading Corner

Create a cozy reading corner within your bedroom by repurposing a bedside cabinet. The cabinet's drawers can hold books, magazines, or notepads, while the top surface can accommodate a comfortable reading pillow or a small, adjustable lamp. Adding a soft blanket completes the picture, transforming your bedroom into a tranquil reading haven.

A Stylish Makeup Vanity

For those who enjoy a meticulous beauty routine, a DIY bedside cabinet can be repurposed as a stylish makeup vanity. The cabinet's drawers can house makeup brushes, cosmetics, and skincare products. The top surface can accommodate a small mirror, a makeup organizer, and a few decorative elements to personalize the space.

Embracing the DIY Spirit: Unleashing Creativity

The beauty of a DIY bedside cabinet lies in its ability to reflect your personal style and creativity. Embrace the process and let your imagination run wild:

Materials and Techniques

From reclaimed wood to vintage furniture, the materials used in crafting your bedside cabinet can significantly impact its aesthetic and functionality. Explore various woodworking techniques, including staining, painting, distressing, and decoupage, to achieve the desired look.

Unique Design Elements

Don't be afraid to incorporate unique design elements that reflect your personality. Consider adding a decorative molding, a custom-made handle, or a personalized inscription. Experiment with different finishes, such as metal accents, glass inserts, or antique hardware, to create a truly one-of-a-kind piece.

Personalized Touches

Add personalized touches to your DIY bedside cabinet to enhance its charm and sentimental value. Include a family photo, a treasured memento, or a handwritten inscription to make it a cherished keepsake. These details will create a sense of warmth and individuality in your home.

Beyond the Basics: Maximizing Functionality

A DIY bedside cabinet can be more than just a storage solution. Explore ways to maximize its functionality and enhance its utility in your home:

Built-in Lighting

Incorporate built-in lighting within the cabinet's structure to illuminate the surrounding area. A small LED strip or a discreet lamp can add a touch of ambiance to your bedroom or other spaces.

Integrated Outlets

For a touch of modern convenience, consider integrating electrical outlets within the cabinet's structure. This will allow you to easily charge devices, use small appliances, or illuminate the space without cluttering your countertop.

Hidden Storage Solutions

Maximize the storage capacity of your DIY bedside cabinet by incorporating hidden compartments or secret drawers. These can be used to discreetly store valuables, personal items, or any objects that require additional security.

Movable Wheels

Add a touch of versatility by attaching casters or wheels to the bottom of your DIY bedside cabinet. This will allow you to easily move the cabinet around the room, rearranging your furniture or relocating it to different spaces as needed.

In conclusion, a DIY bedside cabinet is a testament to the boundless creativity and ingenuity of homeowners. By embracing the spirit of customization, you can transform this humble piece of furniture into a multi-faceted element, enhancing the functionality and aesthetics of various spaces in your home. Whether you're seeking a practical storage solution, a decorative accent, or a personalized keepsake, a DIY bedside cabinet offers endless possibilities, allowing you to create a home that truly reflects your unique style and personality.

Read More..

Modern DIY Bedside Cabinet Designs You Can Build at Home

Modern DIY Bedside Cabinet Designs You Can Build at Home

Modern DIY Bedside Cabinet Designs You Can Build at Home

Elevate your bedroom's aesthetic and functionality with custom-built bedside cabinets. These handy companions provide a space for your essentials while adding a touch of personal flair to your sanctuary. This comprehensive guide will explore modern DIY bedside cabinet designs, equipping you with the knowledge and inspiration to build your own stunning creations.

Planning Your Bedside Cabinet

Before embarking on your DIY journey, it's crucial to have a clear vision for your bedside cabinet. Consider the following aspects:

Style and Aesthetics

  • Modern Minimalism: Sleek lines, clean surfaces, and a focus on functionality. Consider using materials like wood, metal, or acrylic.
  • Industrial Chic: Raw materials like reclaimed wood, exposed metal accents, and a rugged aesthetic.
  • Mid-Century Modern: Curved edges, tapered legs, and a mix of natural wood and bold colors.
  • Rustic Charm: Warm wood tones, distressed finishes, and natural textures.
  • Size and Dimensions

    Measure the space available next to your bed and determine the optimal size for your bedside cabinet. Consider the height, width, and depth that best suit your needs.

    Storage Requirements

    Decide what you plan to store in your bedside cabinet. A drawer for smaller items, shelves for books, or a combination of both? The number and configuration of shelves and drawers will impact the overall design.

    Materials and Finishes

  • Wood: Versatile and widely available, from pine and oak to walnut and cherry.
  • Metal: Adds a modern or industrial touch. Consider steel, aluminum, or brass.
  • Acrylic: Provides a sleek, contemporary look.
  • Finishes: Stain, paint, or lacquer to achieve the desired look and protect the material.
  • Essential Tools and Materials

    Here's a list of tools and materials you'll likely need for your DIY bedside cabinet project:

    Tools

  • Saw (circular, jigsaw, or table saw)
  • Drill
  • Screwdriver
  • Measuring tape
  • Level
  • Clamps
  • Sandpaper
  • Safety glasses
  • Dust mask
  • Gloves
  • Materials

  • Wood (lumber, plywood, or MDF)
  • Hardware (hinges, drawer slides, knobs, pulls)
  • Screws
  • Glue
  • Paint or stain
  • Finish (varnish, lacquer, or wax)
  • Modern Bedside Cabinet Designs

    Let's delve into some inspiring modern bedside cabinet designs you can build at home.

    Floating Bedside Cabinet

    This minimalist design creates a sense of spaciousness and airiness. The cabinet appears to float on the wall, eliminating the need for bulky legs. Use a sturdy piece of plywood or MDF for the base and attach it securely to the wall. Add a single drawer or a shelf for storage. Finish with a clean, minimalist stain or paint.

    Geometric Bedside Cabinet

    Embrace geometric shapes for a bold, contemporary design. Consider a rectangular cabinet with angled edges or a triangular shape. Use contrasting wood species or paint to create visual interest. Geometric accents, such as metal drawer pulls, enhance the modern feel.

    Open Shelving Bedside Cabinet

    This design offers a streamlined aesthetic and easy access to your essentials. Use a combination of shelves and a single drawer to create a balanced look. Opt for materials like wood, metal, or acrylic to match your bedroom's style. Consider adding LED strip lights beneath the shelves for a modern touch.

    Bedside Cabinet with a Built-in Reading Lamp

    Combine functionality and style with a built-in reading lamp. Integrate a small, adjustable lamp into the side of the cabinet. Choose a minimalist lamp design to complement the overall style. Use a dimmer switch for adjustable lighting.

    Bedside Cabinet with a Hidden Compartment

    Create a secret storage space within your bedside cabinet. Use a hidden compartment for valuable items or to add a unique design element. Consider a drawer with a false bottom or a hidden shelf behind a panel.

    Construction Steps

    Once you've chosen your design and gathered your materials, follow these general construction steps:

    Cutting and Assembly

  • Cut the wood pieces to your desired dimensions using a saw.
  • Join the pieces together using glue, screws, or both.
  • Use clamps to secure the joints while the glue dries.
  • Finishing

  • Sand the cabinet smooth with sandpaper.
  • Apply a stain or paint to achieve the desired color and finish.
  • Seal the finish with varnish, lacquer, or wax for protection.
  • Installing Hardware

  • Attach drawer slides to the cabinet and drawers.
  • Install hinges on the cabinet doors.
  • Mount the cabinet on the wall or install legs.
  • Add knobs or pulls to the drawers and doors.
  • Tips for Success

  • Plan Ahead: Carefully measure and create a detailed construction plan.
  • Use Quality Materials: Invest in durable wood or other materials for a long-lasting cabinet.
  • Pay Attention to Detail: Take your time, ensure accurate cuts and even finishes.
  • Safety First: Wear safety glasses, a dust mask, and gloves when working with tools.
  • Finish with Flair: Choose a stain, paint, or other finish that complements your bedroom décor.
  • Conclusion

    Building your own modern bedside cabinet is a rewarding project that allows you to create a piece of furniture that reflects your unique style and complements your bedroom's aesthetic. With a little planning, patience, and creativity, you can create a custom bedside cabinet that serves as a practical storage solution and a stylish focal point. Remember, it's your design, so don't be afraid to experiment and make it your own!

    Read More..

    How to make a grill gazebo with sliding doors for extra protection

    How to make a grill gazebo with sliding doors for extra protection

    Constructing a Grill Gazebo with Sliding Doors for Enhanced Protection

    A grill gazebo provides a comfortable and protected space for outdoor cooking and entertaining. Incorporating sliding doors into the design offers an additional layer of security, privacy, and weather protection. This comprehensive guide will walk you through the process of building a grill gazebo with sliding doors, ensuring a safe and enjoyable grilling experience.

    Planning and Design Considerations

    Determine the Location and Size

    Choose a suitable location for your gazebo, taking into account proximity to the grill, existing structures, and desired views. Consider the dimensions of your grill and the amount of space you need for comfortable movement and storage. Measure the area carefully and create a detailed plan to ensure the gazebo fits seamlessly within the landscape.

    Material Selection

    Select durable and weather-resistant materials for the gazebo structure and roof. Common options include:

    • Aluminum: Lightweight, rust-resistant, and relatively inexpensive.
    • Steel: Strong and durable, but susceptible to rust without proper treatment.
    • Wood: Adds warmth and natural aesthetics but requires regular maintenance.
    • Vinyl: Low-maintenance, water-resistant, and available in a range of colors.

    For the roof, consider options like:

    • Polycarbonate: Durable, clear, and offers excellent UV protection.
    • Metal: Lightweight and offers good weather resistance.
    • Canvas: Provides shade and ventilation but may require regular cleaning.

    Design Features

    Consider these design features for enhanced functionality and aesthetics:

    • Sliding Doors: Choose a sliding door mechanism that is easy to operate and provides a smooth, secure seal.
    • Ventilation: Incorporate vents or windows to allow for air circulation and prevent overheating.
    • Storage: Include shelves or drawers for grilling tools, utensils, and other accessories.
    • Lighting: Install LED lights for nighttime grilling and entertaining.

    Construction Process

    Foundation and Framing

    1. Prepare the site by leveling the ground and marking the dimensions of the gazebo. 2. Install concrete piers or wooden posts to support the frame, ensuring they are plumb and level. 3. Build the frame using pre-cut lumber or metal components according to the plan. 4. Secure the frame to the piers or posts using bolts or brackets.

    Roof Installation

    1. Attach the roof rafters to the frame, ensuring they are properly spaced and aligned. 2. Install the roof sheathing, using plywood or other suitable material. 3. Apply roofing felt or underlayment for waterproofing. 4. Secure the chosen roofing material (polycarbonate, metal, or canvas) to the sheathing using screws or nails.

    Sliding Door Installation

    1. Determine the door openings and mark the frame accordingly. 2. Install the door tracks and rollers according to the manufacturer's instructions. 3. Cut and assemble the door panels using the chosen material. 4. Attach the door panels to the rollers and ensure they slide smoothly along the tracks. 5. Install door hardware (handles, locks) for security and easy operation.

    Finishing Touches

    1. Apply a sealant or paint to protect the frame and roof from the elements. 2. Install siding or trim for aesthetic appeal and added protection. 3. Attach any additional features like shelves, storage compartments, or lighting. 4. Clean and decorate the gazebo to create a welcoming and inviting space.

    Safety Considerations

    1. Fire Safety: Keep a fire extinguisher readily available and be aware of potential fire hazards. Ensure proper ventilation to prevent the accumulation of smoke and heat. 2. Electrical Safety: Install electrical outlets with GFCI protection and use appropriate extension cords. 3. Structural Stability: Regularly check the frame and roof for any signs of damage or weakness. Secure the gazebo to the ground during windy conditions. 4. Weather Protection: Close the sliding doors and secure the gazebo during heavy rain or strong winds. 5. Children and Pets: Supervise children and pets near the gazebo and keep them away from hot surfaces and potentially hazardous areas. 6. First Aid: Keep a well-stocked first aid kit accessible for any injuries.

    Conclusion

    Building a grill gazebo with sliding doors requires careful planning, attention to detail, and a focus on safety. By following the steps outlined in this guide, you can create a functional and aesthetically pleasing outdoor space that enhances your grilling experience. Remember to prioritize safety measures and maintain the gazebo regularly to ensure its longevity and enjoyment for years to come.

    Read More..

    Guide to crafting a multi-functional wood desk with storage

    Guide to crafting a multi-functional wood desk with storage

    Building Your Dream Multi-Functional Wood Desk: A DIY Guide

    Hey there, woodworking enthusiasts and aspiring furniture makers! Are you tired of cramped desks and cluttered workspaces? Craving a piece of furniture that not only looks sleek but also caters to all your organizational needs? Then you've come to the right place! We're diving headfirst into the world of multi-functional wood desks with built-in storage, a project that's both rewarding and practical. This guide will walk you through every step, from planning to finishing, ensuring you end up with a piece that's as unique as you are.

    Planning Your Multi-Functional Masterpiece:

    Before you start swinging that hammer, it's crucial to plan your desk meticulously. This involves deciding on the following:

    1. Size and Shape:

    First things first: what size desk fits your space and needs? Consider your workspace, the type of tasks you'll be doing (e.g., writing, drawing, crafting), and the amount of storage you require. Do you want a large, L-shaped desk for a home office setup or a compact desk for a smaller room? Think about the overall shape - rectangular, oval, or even a unique custom design!

    2. Materials:

    Wood is the star of the show here, but the options are plentiful! Pine, oak, maple, and walnut are popular choices, each with its own grain patterns and durability. Consider the type of wood's color, hardness, and price to find the perfect fit for your project. Plywood is another great option, offering stability and affordability. For added strength and durability, consider using a combination of different woods for different parts of the desk.

    3. Storage Features:

    This is where your creativity really shines! Do you need drawers for files and stationery, shelves for books and electronics, or a combination of both? Maybe you want a built-in keyboard tray, a hidden cable management system, or a pull-out monitor stand. The options are practically limitless!

    4. Style:

    What vibe are you going for? A rustic farmhouse look? A sleek and modern feel? A classic minimalist aesthetic? The style of your desk will influence your choice of wood, finishes, and hardware. This is also where you can personalize your project - think about unique details like decorative carving, metal accents, or even a fun paint job.

    5. Budget:

    Be realistic about your budget, considering the cost of materials, tools, and any custom hardware. Don't be afraid to adjust your plans if necessary to stay within your budget - remember, DIY projects are all about getting creative and finding solutions!

    Gathering Your Tools and Materials:

    Now that you have a solid plan, it's time to gather your tools and materials. Here's a comprehensive list to get you started:

    Tools:

  • Circular Saw
  • Jig Saw
  • Router
  • Sanding Block or Sander
  • Drill/Driver
  • Screwdriver
  • Clamps
  • Measuring Tape
  • Pencil
  • Level
  • Safety Glasses
  • Dust Mask
  • Work Gloves
  • Materials:

  • Wood (planks or sheets, depending on your design)
  • Wood Glue
  • Screws (different sizes for various applications)
  • Wood Finish (stain, paint, or sealant)
  • Hardware (hinges, drawer slides, knobs, pulls)
  • Finishing Supplies (brushes, rags, sandpaper)
  • Note: This is a basic list, and your specific needs may vary depending on your project design and complexity. If you're unsure about certain tools, it's always best to consult with a professional or watch instructional videos online.

    Construction Time!:

    Alright, let's get our hands dirty! Building a multi-functional desk involves several steps, which we'll break down into manageable chunks.

    1. Cutting and Joining:

    First, cut your wood pieces to size according to your plan. Measure twice, cut once! Use a circular saw for straight cuts and a jigsaw for curves or intricate shapes. Join your pieces using wood glue and screws for added strength and durability. Ensure all your joints are strong and flush for a professional finish.

    2. Building the Storage Features:

    Now comes the fun part - constructing your storage compartments! For drawers, you'll need to build drawer boxes and install drawer slides. For shelves, simply cut your shelves to size and attach them to the desk frame. If you're incorporating a keyboard tray, make sure it slides smoothly and is at a comfortable height. Remember to add a touch of flair with decorative hardware!

    3. Desk Top Assembly:

    The desktop is the centerpiece of your desk. You can use a single piece of wood or a combination of planks joined together. If you're using planks, ensure they are perfectly aligned and secure. Create a smooth surface by sanding the top well before moving on to the finishing steps.

    4. Finishing Touches:

    Congratulations, you've built the structure! Now it's time to make your desk truly shine. Start by sanding all the surfaces to smooth out any rough edges or imperfections. Then, apply your chosen wood finish - stain, paint, or sealant. Ensure even application and follow the manufacturer's instructions for drying time. Once the finish is dry, you can add any decorative hardware or accents to complete your masterpiece.

    Beyond the Basics: Embellishing Your Desk:

    Now that you have a solid foundation, it's time to unleash your creativity and elevate your desk from good to extraordinary. Here are some inspiring ideas to make your desk truly unique:

    1. Add Some Color:

    Paint your desk a vibrant color to inject personality into your workspace. You can use a single color or get creative with stripes, geometric patterns, or ombre effects. You can also create a distressed look by sanding away some of the paint for a vintage feel.

    2. Embrace Texture:

    Don't be afraid to incorporate textured elements! Use textured wallpaper for a unique look, or add decorative panels made from different materials like leather, metal, or even cork. You can also create your own texture using wood carving techniques or by applying decorative finishes like crackle paint or wood grain transfer paper.

    3. Lighting Solutions:

    Good lighting is essential for a comfortable and productive workspace. Consider adding built-in lighting under the desk top or on the sides, or install an overhead pendant light for a stylish touch. You can also incorporate a small desk lamp with adjustable settings for focused task lighting.

    4. The Finishing Touches:

    Make your desk truly yours by incorporating personal touches. Add a decorative plant, a family photo, or a piece of art that inspires you. Consider using hooks or shelves for hanging items like coats, bags, or even your favorite artwork. The possibilities are endless!

    Troubleshooting and Maintenance:

    Even the best-built desks need a little TLC now and then. Here are some common issues and their solutions:

    1. Loose Joints:

    If you notice any loose joints, tighten screws or reapply wood glue. You can also use wood filler to fill in any gaps or cracks for a seamless finish.

    2. Scratches and Dents:

    Small scratches and dents can be easily repaired with a little sanding and wood filler. For deeper scratches, you may need to use wood putty or a wood repair kit.

    3. Damaged Finish:

    If your desk's finish is chipped or worn, you can sand down the affected area and reapply a fresh coat of finish. Make sure to choose a finish that is compatible with the existing one.

    4. Squeaky Drawers:

    Squeaky drawers can be annoying, but they are easily fixed! Apply some lubricating oil or wax to the drawer slides to reduce friction.

    Conclusion:

    Congratulations, you've now embarked on the incredible journey of building your dream multi-functional wood desk! Remember, this guide is a starting point - embrace your creativity, experiment with different designs, and most importantly, have fun! With a little effort and passion, you'll create a piece of furniture that's as unique as you are. So, grab your tools, gather your materials, and let your woodworking dreams take flight!

    Read More..